Brilliant baking recipes using strong white flour you should try this autumn!

Happy Autumn! We’re excited about entering this beautiful season and enjoying the lovely breeze, vibrant colours, and views it brings!
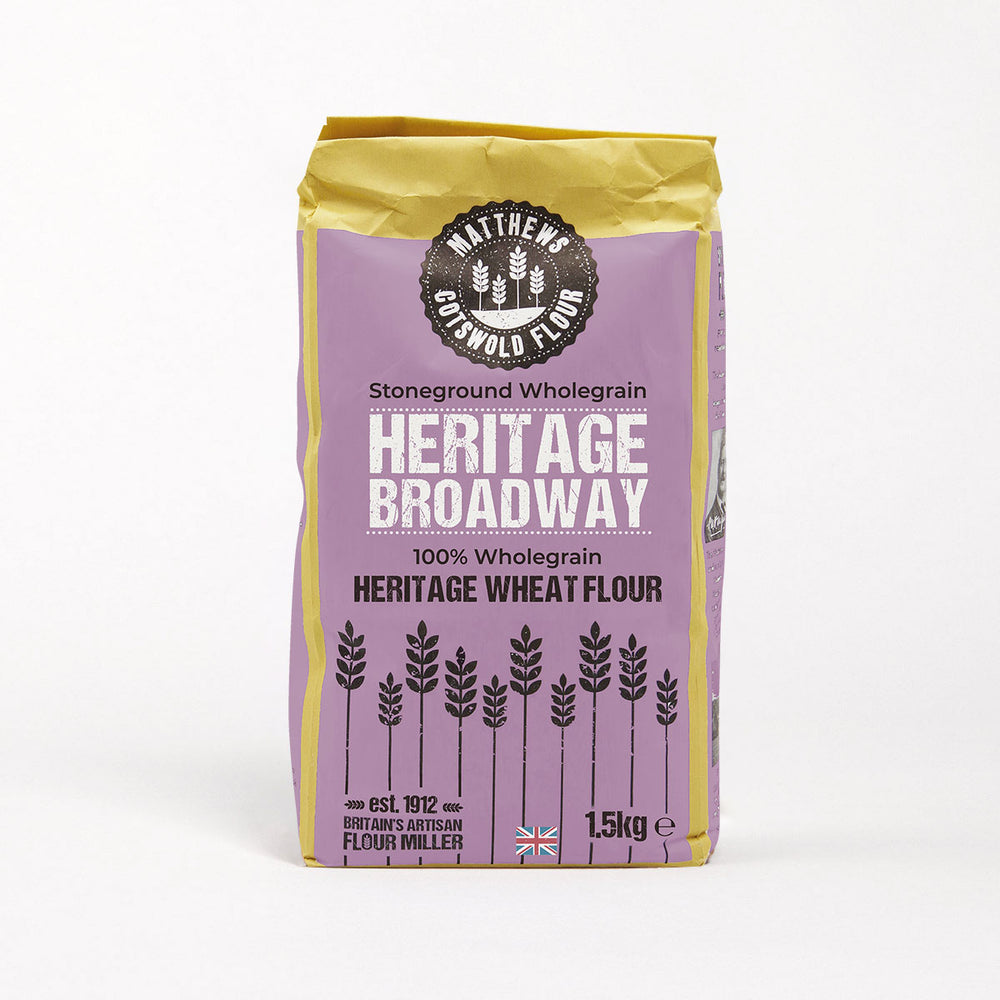
We’re also excited to get our bake on! Check out six recipes you should try using our best selling Cotswold Strong White flour!
1. Blueberry cinnamon rolls

Ingredients
For the dough
- 420g strong white flour, plus extra for dusting
- 60g caster sugar
- 10g dried fast-action yeast
- 100ml of milk
- 40g butter, plus extra for greasing
For the filling
- 150g blueberries, halved
- 1 orange
- 5g ground cinnamon grating of nutmeg
- 18g brown sugar
To finish
- 1 free-range egg, beaten for glazing
- 70g icing sugar
- 8ml lemon juice or water
- Candied walnuts, to decorate
Instructions
- For the dough, place the flour, sugar and yeast in the bowl of a freestanding electric mixer fitted with a dough hook.
- Pour the milk and 100ml/3½fl oz water into a saucepan and add the butter. Heat until the butter is melted. Check the temperature: it should be lukewarm to activate the yeast. Pour the milk mixture over the dry ingredients with the dough hook slowly turning. ‘Knead’ in the machine for about 5 minutes, until a smooth dough has formed.
- Brush a mixing bowl with some oil and place the dough into the bowl. Cover with cling film and leave to rise in a warm place: this will probably take about 2 hours. You can leave it in a cool oven (40C Fan) if your oven has a dough rising function and this should take about 1 hour.
- When the dough has doubled in size, place on a lightly floured surface and ‘knock back’ by kneading by hand for a few minutes to release the air. Butter a 23cm/9in round springform tin.
- To shape, roll the dough out to a rectangle. Sprinkle the blueberries, orange zest, ground cinnamon, nutmeg and brown sugar over the dough. Starting at a long end, roll up the dough (like a Swiss roll). Slice into 10–12 swirls using a sharp knife. Transfer to the buttered tin with the swirls arranged cut-side up.
- Brush with oil and place in a warm place to rise for about 30 minutes, or until doubled in size again
- Preheat the oven to 200C/180C Fan/Gas 6.
- Brush with egg wash and bake for 20–25 minutes, or until golden-brown and cooked through. Place on a wire rack to cool.
Mix together the icing sugar and lemon juice (or water) in a bowl to form a paste and drizzle over the top of the swirls. Scatter over the candied nuts and enjoy.
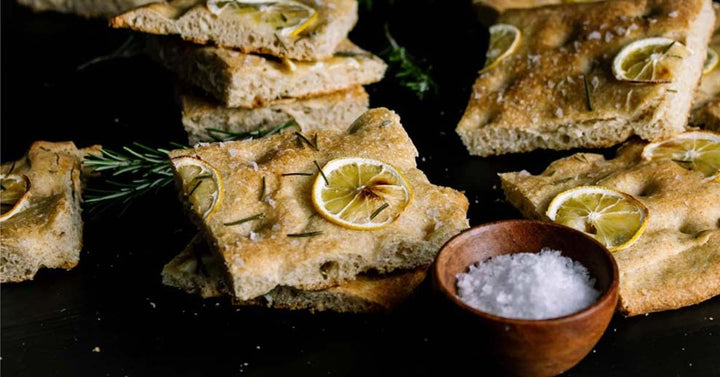
2. Focaccia

Ingredients
- 500g strong white flour
- 8g salt
- 7g dried easy blend yeast
- 10ml olive oil
- 400ml cold water
- Olive oil for drizzling
- Fine sea salt
Instructions
- Place the flour, salt, yeast, olive oil and 300ml of the water into a large bowl. Gently stir with your hand or a wooden spoon to form a dough, then knead the dough in the bowl for five minutes, gradually adding the remaining water.
- Stretch the dough by hand in the bowl, tuck the sides into the centre, turn the bowl 90 degrees and repeat the process for about five minutes.
- Tip the dough onto an oiled work surface and continue kneading for five more minutes. Return the dough to the bowl, cover and leave to rise until doubled in size.
- Line a large baking tray with baking paper. Tip the dough out of the bowl and flatten the dough onto the prepared tray, pushing to the corners, cover with a large plastic bag, making sure it does not touch the top of the dough, then leave to prove for one hour.
- Preheat the oven to 220C. Drizzle the loaves with oil, sprinkle with fine sea salt then bake in the oven for 20 minutes. When cooked, drizzle with a little more olive oil and serve hot or warm.
3. Easy white bread

Ingredients
- 500g strong white bread flour, plus a little extra flour for finishing
- 40g soft butter
- 7g sachet fast-action dried yeast
- 13g of salt
- 300ml tepid water (warm not cold – about body temperature)
- A little olive or sunflower oil
Instructions
- Put the flour into a large mixing bowl and add the butter. Add the yeast at one side of the bowl and add the salt at the other, otherwise the salt will kill the yeast. Stir all the ingredients with a spoon to combine.
- Add half of the water and turn the mixture round with your fingers. Continue to add water a little at a time, combining well, until you’ve picked up all of the flour from the sides of the bowl. You may not need to add all of the water, or you may need to add a little more – you want a dough that is well combined and soft, but not sticky or soggy. Mix with your fingers to make sure all of the ingredients are combined and use the mixture to clean the inside of the bowl. Keep going until the mixture forms a rough dough.
- Use about 5ml of oil to lightly grease a clean work surface (using oil instead of flour will keep the texture of the dough consistent). Turn out your dough onto the greased work surface (make sure you have plenty of space).
- Fold the far edge of the dough into the middle of the dough, then turn the dough by 45 degrees and repeat. Do this several times until the dough is very lightly coated all over in olive oil.
- Now use your hands to knead the dough: push the dough out in one direction with the heel of your hand, then fold it back on itself. Turn the dough by 90 degrees and repeat. Kneading in this way stretches the gluten and makes the dough elastic. Do this for about 4 or 5 minutes until the dough is smooth and stretchy. Work quickly so that the mixture doesn’t stick to your hands – if it does get too sticky you can add a little flour to your hands.
- Clean and lightly oil your mixing bowl and put the dough back into it. Cover with a damp tea towel or lightly oiled cling film and set it aside to prove. This gives the yeast time to work: the dough should double in size. This should take around one hour, but will vary depending on the temperature of your room (don’t put the bowl in a hot place or the yeast will work too quickly).
- Line a baking tray with baking or silicone paper (not greaseproof).
- Once the dough has doubled in size scrape it out of the bowl to shape it. The texture should be bouncy and shiny. Turn it out onto a lightly floured surface and knock it back by kneading it firmly to ‘knock’ out the air. Use your hand to roll the dough up, then turn by 45 degrees and roll it up again. Repeat several times. Gently turn and smooth the dough into a round loaf shape.
- Place the loaf onto the lined baking tray, cover with a tea towel or lightly oiled cling film and leave to prove until it’s doubled in size. This will take about an hour, but may be quicker or slower depending on how warm your kitchen is.
- Preheat the oven to 220C. Put an old, empty roasting tin into the bottom of the oven.
- After an hour the loaf should have proved (risen again). Sprinkle some flour on top and very gently rub it in. Use a large, sharp knife to make shallow cuts (about 1.5cm deep) across the top of the loaf to create a diamond pattern.
- Put the loaf (on its baking tray) into the middle of the oven. Pour a little water into the empty roasting tray at the bottom of the oven just before you shut the door – this creates steam which helps the loaf develop a crisp and shiny crust.
- Bake the loaf for about 30 minutes.
- The loaf is cooked when it’s risen and golden. To check, take it out of the oven and tap it gently underneath – it should sound hollow. Turn onto a wire rack to cool.
4. Pitta Bread

Ingredients
- 9g dried yeast
- 300ml tepid water
- 5g olive oil, plus extra for greasing
- 6g fine sea salt
- 500g strong white bread flour
Instructions
- Pour the yeast in the water and whisk it in. Set aside until it starts to bubble.
- Add the oil and salt to the flour. Mix to combine using your hands or a freestanding mixer fitted with a dough hook.
- Slowly add the yeasty water until the dough comes together. (If using a mixer, slowly incorporate the yeasty water on a slow speed until the dough comes together.)
- Once all the water has been incorporated, knead the dough for 5–8 minutes in the mixer, or until the mixture stretches when pulled. If kneading the dough by hand, hold the dough and stretch it away from you with the heel or knuckles of one hand and fold it back over the top towards you, turn the dough and repeat the stretching and folding. It’ll usually take 5–10 minutes to do it properly and you know it’s ready when the dough stretches easily without tearing.
- Lightly oil a clean large bowl and add the dough. Cover with a tea towel and leave the dough to prove in a warm place for about 1 hour, or until the dough has doubled in size (it will take longer in a cold room).
- While the dough is proving, preheat the oven to 240C.
- When the dough is ready, shape it into a flat ‘sausage’ shape. Cut the sausage into about 8 equal sections.
- Dust a board very lightly with flour and roll each portion into a ball. Roll the dough backwards and forwards with a rolling pin until your dough turns into a flat oval pitta shape, but you can have fun and experiment with the shapes of your pittas.
- Sprinkle a large baking sheet or tray with flour. Place the pitta breads on the baking tray with a little space between each one and cook in the oven for about 4–5 minutes until they are lightly golden on the top and have puffed up.
- Take the pittas out of the oven and leave to cool slightly. If you can tear open the pitta to create a ‘pocket’, then you know you’ve done a brilliant job!
5. English muffins

Ingredients
- 300g strong white bread flour, plus extra for flouring
- 6g fast-action yeast
- 6g salt
- 15g caster sugar
- 15g softened butter, cut into small pieces
- 1 medium free-range egg, lightly beaten
- 170ml oz milk
- Oil for greasing
- 15g semolina or polenta, plus extra for dusting
Instructions
- Tip the flour into a large mixing bowl. Sprinkle the yeast on one side of the flour and the salt into the other side of the flour. Add the sugar, butter, egg and milk, then mix all the ingredients together to form a soft dough.
- Turn the mixture out of the bowl onto a lightly floured surface and knead for 10 minutes, or until soft, smooth and stretchy.
- Lightly grease a large bowl with oil. Place the dough in the oiled bowl, cover and leave to prove for about one hour, or until doubled in size.
- Dust the work surface with a mixture of the semolina/polenta and flour. Tip the dough out onto the work surface and roll out to about 2.5cm thick.
- Lightly dust two baking trays with half of the semolina or polenta.
- Using a 9cm/3½oz straight-sided cutter, cut out eight muffins. Place four muffins, evenly spaced apart on each of the dusted baking trays. Dust the remaining semolina or polenta over the top of the muffins.
- Leave to prove for another 30 minutes.
- Preheat the hot plate or a heavy-based frying pan on the hob to a very low heat. Griddle the muffins for approximately 5-6 minutes, then flip over and griddle for another 5-6 minutes on the other side.
6. Vegan hot cross buns

Ingredients
- 65g dairy-free margarine
- 50g caster sugar
- 250ml lukewarm unsweetened almond milk, or other plant-based milk
- 7g sachet dried fast-action yeast
- 400g strong white flour, plus extra for dusting
- A pinch of fine sea salt
- 8g of ground mixed spice
- 150g of dried mixed fruit sunflower oil for greasing
For decoration
- 25g of strong white flour
- 6g of maple syrup
Instructions
- Heat the dairy-free margarine in a saucepan very gently until melted, stirring with a wooden spoon. Remove from the heat and stir in the sugar and milk; the milk should be lukewarm (if it remains quite cold, heat it gently but don’t allow it to overheat or the yeast won’t work). Sprinkle the yeast over the milk, stir and leave to stand for 2 minutes.
- Mix together the flour, salt and mixed spice in a large bowl. Make a well in the centre. Pour the warm milk into the flour mixture, stirring with a wooden spoon until the mixture forms a soft ball.
- Turn onto a very lightly floured surface and knead for 5 minutes to make a smooth, pliable dough. Knead the mixed fruit into the dough, a little at a time, for 2–3 minutes, or until evenly distributed. Place the dough in a lightly oiled bowl and cover with oiled cling film. Leave to rise in a warm place for 1½ hours, or until doubled in size and spongy to touch.
- Return the dough to the work surface and knock back with your knuckles. Knead lightly, then divide into 12 portions. Roll each portion into a ball, then pull the dough from around the sides to underneath each bun to give a neat shape.
- Place the buns around 1.5cm apart on a baking tray lined with baking paper. Flatten slightly with the palm of your hand. Cover lightly with oiled cling film and leave to prove for 45–60 minutes, or until well risen. The buns should be just touching each other. Preheat the oven to 200C and remove the cling film from the buns.
- To make the cross decoration, mix the flour with 30ml of cold water to make a smooth paste. It should have a thick dribbling consistency, so you may need to add a few more drops of water, but don’t allow it to get too thin or the crosses won’t show up when the buns are baked. Spoon the paste into a small freezer bag and snip off one corner, or piping bag fitted with a round nozzle. Pipe lines of the flour paste on top of each row of the buns in one direction and then the other.
- Bake the buns in the centre of the oven for 20 minutes, or until risen and golden brown. Brush the warm buns with maple syrup and leave to cool a little before eating. Once cold, they can also be toasted under a grill.
For more baking inspirations, check out our baking recipes!
← Older Post Newer Post →